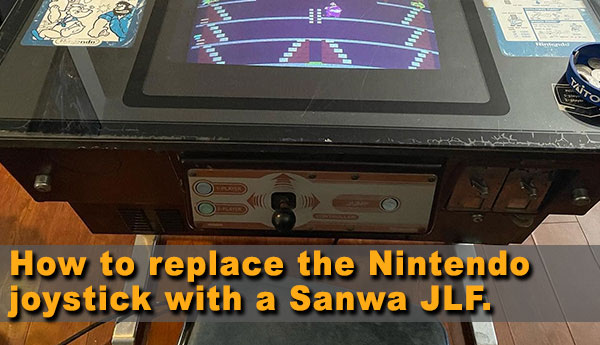
 I'll just outright say it: I hate Nintendo Arcade Joysticks.
I do not like their range of motion, the ball top are always too small and I just never liked the feel of using one. I always feel like I'm struggling against the sticks and even after refurbing them, they still felt stiff and clumsy as ever. I found a great deal locally where I picked up this Popeye Nintendo Cocktail machine and brought it home. It's in pretty good shape; the price was right eventhough the monitor could use a new cap kit and the control panel is just at a weird uncomfortable angle but that's just the quirks of a very old Nintendo cocktail cabinet.
I generally veer away from Nintendo cabinets because I prefer jamma cabinets and the ablity to swap out boards, but I actually really like this game. While I would never go out of my way to defend Popeye as one of Nintendo’s better arcade games, because Donkey Kong exists, it just has a special place in my heart that brings back great memories of when I was a kid playing the Popeye port on my Dad’s Atari 2600.
I do have a huge appreciation to Nintendo's build quality of their cocktail cabinets. The first thing that stands out to me about this machine is how it is mostly made of metal, instead of wood like my Pac-Man cocktail. I've been on a collecting tangent where I'm picking up older cabs to fix up and learn from but hey, at least I get to play Popeye with a Nintendo joystick that always feels like a struggle, right?
Wrong.
It was brought to my attention from BirdlandArcade on Instagram that you can easily remove the Nintendo joystick and swap it out with a standard Sanwa JLF. Needless to say, that really piqued my interest and I wanted to do this mod to my cabinet.
Here's how...
WARNING:
This is a simple project if you have some technical skills. This walkthrough is as simplified as I can make it so if none of this makes an sense then please DO NO ATTEMPT.
Attempt at your own risk!
Tools and Items needed:
- Phillips screw Driver
- Socket Set
- Small Flat Head Screw Driver
- Sanwa JLF joystick
- Egret Mounting Plate
- Sanwa harness with Male Ends
Optional
- Aluminum Ball Top
- Aluminum Shaft
- Heavy Spring (I went 6lbs due to using heavier Aluminum parts)

This conversion is super simple and reversible. If you don't like the feel of the Sanwa sticks, you can always reinstall the Nintendo joystick. The hardest item to obtain are the Egret Mounting plate, but they are needed because the holes perfectly line up to the Nintendo factory bolt pattern. I bought mine directly from BirdlandArcade via direct messaging, but you can maybe find a shop that deals with Taito machines. Maybe someone really should reproduce these with a 3D printer.
I had a few Sanwa JLF in my personal inventory so I needed to get an adaptor harness to connected to the machine control panel. If can skip the need for harness this if you buy a Sanwa stick with exposed cherry switches. You can get them here at Paradise Arcade Shop.
The final item you need is the Sanwa Joystick To 0.187 Terminal Jamma Harness Adapter which can be purchased or just make your own by adding 0.187 terminals on an existing Sanwa joystick harness.
 Open your cocktail to reveal the back of the control panel. I color coded the image above. I already removed the bolts to my panel but I highlighted where it would have been.
 Use your socket set to remove the bolts, highlighted by the White arrows. Use a Philips screwdriver to remove the remaining three screws, highlighted by the orange arrows. Your control panel should now flip away from the arcade cabinet.
 Use a small flathead screw driver to release the joystick C clip and pull the joystick out. Remove the four (4) nuts to deinstall the Nintendo joystick. I kept the stick wired and set it aside, then moved one wire at a time, but this is a good time to label each set of wires for each direction.
 You will need to seperate the Sanwa JLF from the default mounting plate by unscrewing the four (4) screws as shown in the upper photo.
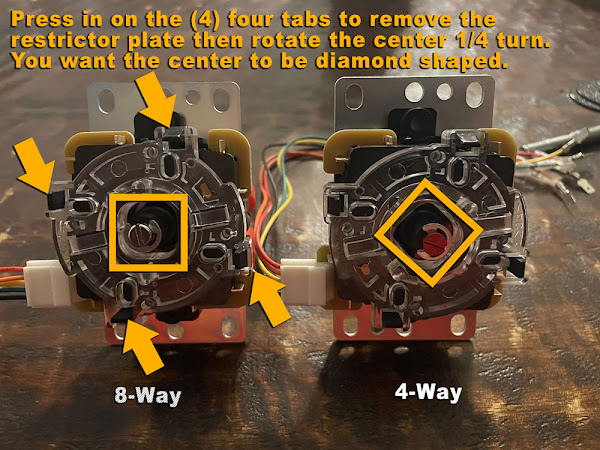
Set the restrictor plate to 4 way by twisting the center into a diamond shape by gently pressing down onto the center while spinning. Install the restrictor plate onto the Sanwa JLF.
 Mount the Sanwa JLF onto the Egret mounting plate. Then sandwich the big black Nintendo dustwasher in-between the panel and the Egret mounting plate. Install the mounting plate to the control panel then slide the joystick shaft through the Nintendo dustwasher and use your C clip to secure.
 Using the wiring guide, install the modified Sanwa wire harness and plug each male end to the control panel's female connector. You will have extra ground connectors as the Sanwa joystick harness only needs one ground. Just Zip tie the extra ground and push it aside
*Optional: I wanted to use Aluminum parts and had to upgrade to a heavier spring. Disregard if you are using stock parts.
 Now screw your ball top onto your newly mounted joystick, remount the panel onto the Nintendo cabinet, and enjoy a joystick that feels more responsive. The benefit of the mod is that it is 100% reversible, and by going with Sanwa sticks, replacement parts are more readily available and cheaper than OEM Nintendo parts. Or just sell off your original Nintendo joysticks online and recoup most of the money you invested into this mod. Just saying.
--Nathan Bias


No comments:
Post a Comment